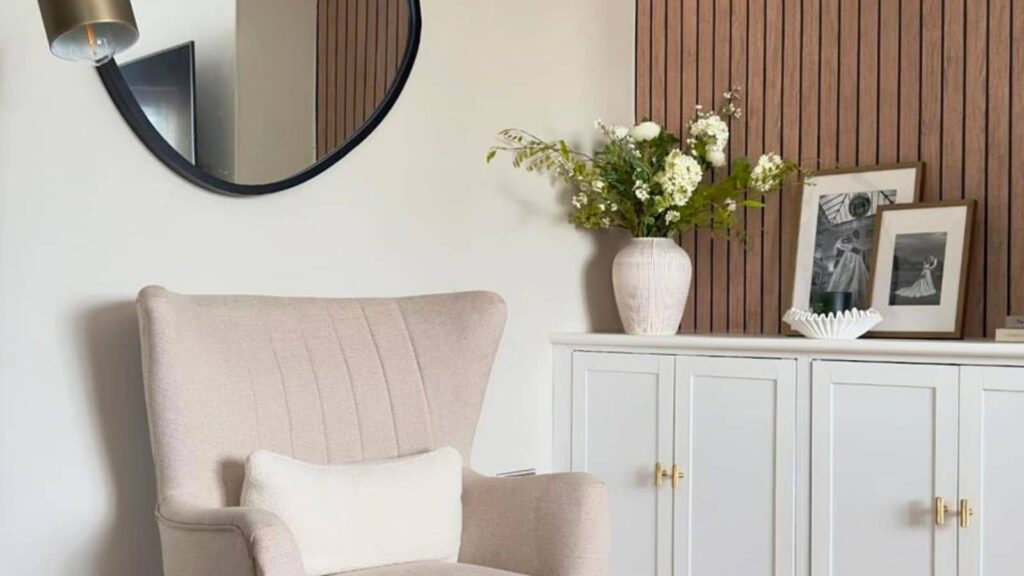
This $500 DIY Turned Vicky’s Living Room Alcove into a Showstopper

Home renovations can often be costly, with custom-built features racking up thousands in expenses. Instagram DIYer Vicky and her husband show that with a bit of elbow grease and can-do spirit, gorgeous modifications can be achieved without breaking the bank.
The first-time DIYers took on the challenge of creating built-in cabinets for their living room alcove and were surprised at what they achieved.
The alcove built-ins are now their favorite feature in their home, and it all happened for a little over $500.
Living Room Before
The living room was a good size, with the fireplace as the central feature. Large windows along the wall offered lots of natural light. The space they wanted to tackle in this IKEA hack was the two alcoves on the left and right of the fireplace. With a plan, Vicky was ready for her vision to come alive.
DIY Alcove Built In with IKEA EKET
Step 1: Assemble EKET cabinets
Vicky and her husband found that the IKEA EKET cabinets were the closest in size to the space they needed to fill. So they bought four of them and began assembling them according to IKEA instructions. Each alcove needed two cabinets.
Step 2: Added Legs
Instead of the typical approach of building a wooden base for built-in cabinets, Vicky chose a simpler alternative. They used adjustable legs bought from Amazon! This clever step probably saved them much time and effort. Keep this in mind if you want to DIY a built-in but don’t have the right woodworking tools to make the base.
Step 3: Level the Cabinets
They measured the height of the skirting board and extended the legs to allow the cabinets to comfortably clear the skirting board. Once the legs were installed and the cabinets were in place, they used a spirit level to check for an even installation.
Step 4: Wallpaper Power
The back wall of the alcove received a stylish upgrade with wooden slat wallpaper from Dunelm UK. This choice was strategic, as Vicky explained, “We loved the slat wall look for these alcoves, but they were so expensive, and I just didn’t want to commit in case we didn’t like it in this space.” The wallpaper offered a realistic alternative that even fooled visitors into thinking it was actual wood paneling.
Step 5: Wooden Top
They ordered made-to-measure window boards for the worktop and trimmed the sides to create a lip to fit the alcove space. The boards were then secured on top of the EKET units.
Step 6: Covering Up the Bottom and Sides
Timber blocks were added underneath and down the sides of the EKET units for the skirting and edging to attach to. This ensures seamless integration with the room’s existing design elements and creates the built-in look.
Step 7: Attach Skirting and Edging
They added construction glue to the timber blocks and fastened the skirting and edging to the blocks.
Step 8: Caulking the Seams
They used a caulking gun to apply a thin bead of caulk along all the joints between the cabinets. They then smoothed the caulk with a wet finger, achieving a clean, polished finish.
Step 9: Paint To Protect
Vicky painted the entire structure with white eggshell paint to achieve a subtle sheen and ensure easy dusting. For a lasting finish, we recommend priming the furniture pieces first with a shellac-based primer before applying the topcoat.
Step 10: Adding Door Trim
They then cut MDF strip wood to size for paneling, painted it, and glued it to the cabinet fronts. Caulk was applied to the wood strips, everything was repainted, and finally, door knobs were added to complete the chic look.
A Budget-Friendly DIY Journey
Initially quoted $2,600 for a professional installation, Vicky and her husband were determined to find a more economical solution. “It was a want, not a need,” Vicky says, highlighting the importance of prioritizing expenses during home renovations. By taking the DIY route, they saved a significant amount of money and added a personal touch to their living space.
Going the Professional Route
Nevertheless, Vicky agrees that there is value in hiring a pro. “We would have saved so much time and possibly got a better finish off a professional. But we saved thousands doing this ourselves, and they came out exactly how we imagined. The achievement we felt when these were finished was also so worth it and gave us the confidence to try more DIY,” she adds.
Fearless DIY
Despite not being trained carpenters, the couple embraced the challenge and found success in their methods. “I have no idea what a carpenter would have done,” Vicky admits. “We have probably done things completely differently or ‘the wrong way,’ but it works for us, and we love them.”
Right The First Time
Although it was their first attempt at DIY, the couple executed the project with remarkable finesse. The custom-built cabinets now bookend the fireplace in their living room, and even after two years, they still look like new.
Follow Vicky on Instagram and their home renovation journey.
The post This $500 DIY Turned Vicky’s Living Room Alcove into a Showstopper appeared first on IKEA Hackers.


