How to Remove Popcorn Ceilings: Pro Tips You’ll Wish You Knew Sooner


Popcorn ceilings—also known as acoustic or cottage cheese ceilings—were once a popular choice for homes due to their ability to hide imperfections and absorb sound. But today, many homeowners want a cleaner, more modern look. In this Redfin article, we’ll guide you through how to remove popcorn ceilings step-by-step—whether you’re tackling the texture in a house in Portland, OR, or updating a home in Tampa, FL. From prep and safety to refinishing tips, we’ll help you decide whether to DIY or call in the pros.

What is a popcorn ceiling?
Popcorn ceilings have a bumpy, textured surface made from a spray-on or paint-on treatment. They became widespread in mid-20th century homes but can date your space today—and in some cases, may contain asbestos.
Removing popcorn texture completely transforms a space
“When we bought our home, removing the popcorn ceilings was our first DIY project,” shares Jason Graphix. “Even after 20 years, it’s still one of the best upgrades we’ve made. Smooth ceilings make a huge difference. We’ve never looked back.”
Step 1: Test for asbestos
Before removing a popcorn ceiling, it’s essential to check for asbestos, especially if your home was built before the 1980s. Asbestos testing kits are available at hardware stores, or you can hire a certified professional.
- If it tests positive for asbestos: Stop work immediately and contact a licensed asbestos abatement contractor.
- If it’s clear: You can move forward with removal yourself or hire a general contractor.
Step 2: Gather your tools and materials
You’ll need the following:
- Drop cloths or plastic sheeting
- Painter’s tape
- Safety goggles and a dust mask or respirator
- Spray bottle or garden sprayer with water
- 6- to 12-inch drywall or putty knife
- Ladder or scaffolding
- Sandpaper or sanding pole
- Joint compound and putty knife (for patching)
- Primer and ceiling paint
A vacuum scraper makes the job easier and less dusty
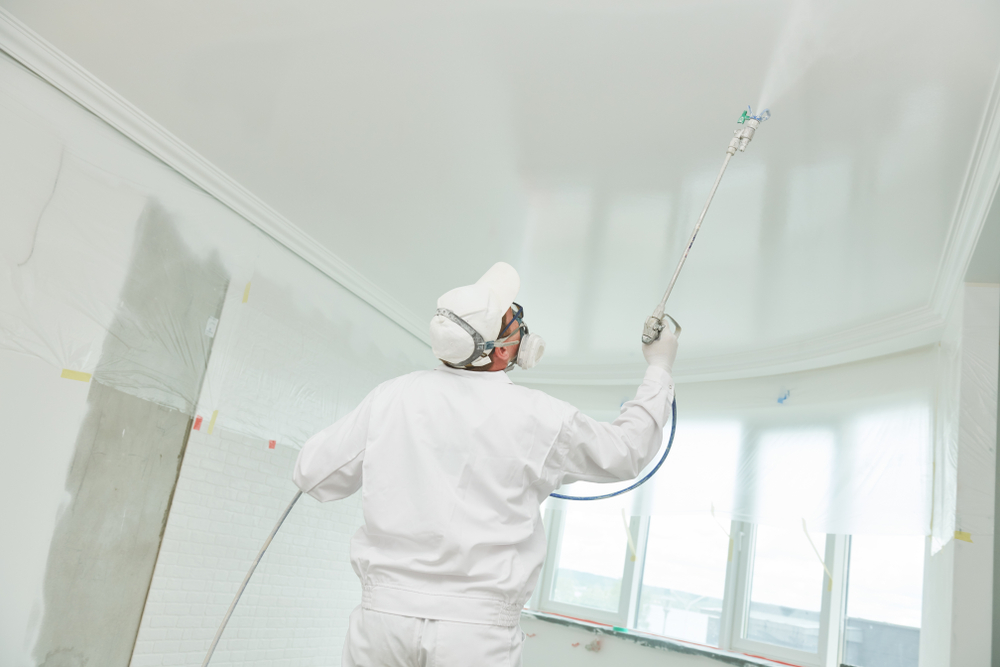
“At DIYwithHelp.com, we love helping homeowners take on projects, but popcorn ceiling removal is best left to pros if asbestos might be present,” warns DIY With Help. “If it’s safe, prep with plastic, wear protective gear, and mist the ceiling before scraping. A scraper with a vacuum attachment makes the job cleaner and faster. This one task is messier than most people expect.”
Step 3: Prepare the space
- Move furniture out of the room or cover it with plastic sheeting.
- Turn off the HVAC system and cover vents.
- Tape plastic sheeting over walls, outlets, and light fixtures.
- Make sure the floor is fully protected with drop cloths.
Remove soft materials and seal everything with plastic
“We tell clients to remove all soft materials like curtains and bedding before scraping starts,” says Hilweh Builders. “Wrap anything left behind in thick plastic and tape it securely. We also cover floors and seal vents and doors to stop dust from spreading. This is essential if anyone in the home is sensitive to allergens or dust.”
Prep the room thoroughly to contain the mess
“Before scraping, remove or cover everything in the room and seal vents and windows,” recommends Renaissance Painting. “We use rosin paper and plastic to protect the floors and mask off walls to keep dust from spreading. Good prep reduces cleanup and protects your home from damage. Don’t underestimate how messy it gets.”

Step 4: Soften the texture
Use a spray bottle or garden sprayer to lightly mist a small section of the ceiling. Let it soak for about 15–20 minutes. Don’t over-soak—it could damage the drywall underneath.
Prime new plaster or mud before you paint
“After scraping and sanding, it’s essential to prime any new mud or plaster with an OVA primer before painting,” advises Gainesville Painting. “This step seals the surface, ensures better paint adhesion, and helps achieve a smooth, professional finish. While smooth ceilings cost more than textured ones, the results are worth it.”
Mist the ceiling to loosen texture and reduce dust
“Misting the ceiling with water helps loosen the texture and cuts down on airborne dust,” says Finest Finish. “Use a wide scraper with slow, even pressure to avoid damaging the drywall. Cover all vents and turn off the HVAC to keep the dust contained.”
Painted popcorn ceilings require stronger removers
“Popcorn comes off easier when it’s damp, but painted ceilings don’t budge with just water,” explains Brightline Painting. “In that case, you’ll need a commercial-grade remover. After scraping, be ready to fill gouges with joint compound. Even a small ceiling can turn into a bigger job than expected.”
Step 5: Scrape the ceiling
Once the texture is damp, gently scrape it off with a putty or drywall knife. Work in small sections. Be careful not to gouge the ceiling.
- Tip: A wider blade helps create smoother passes.
- Optional: For less mess, consider a ceiling texture scraper attachment with a built-in bag.
Step 6: Repair and sand
After removing the texture, inspect the ceiling for gouges or damage. Patch any areas with joint compound, let it dry, and sand until smooth.
Take time to repair the ceiling before refinishing
“Once popcorn is gone, you’ll usually find cracks or popped screws underneath,” notes Flow Drywall. “We resecure the drywall, patch all seams, and sand smooth before refinishing. It’s also the perfect time to update the ceiling lighting. For the finish, we recommend knockdown, orange peel, or smooth, followed by a stain-blocking primer.”
Step 7: Prime and paint
Once your ceiling is smooth and clean:
- Apply a stain-blocking primer.
- Paint with a flat or matte ceiling paint for best results.
Prime before skim coating for a flat, even surface
“After scraping, I always start with a coat of primer—it helps the skim coat stick better,” says Major League Painting. “Three skim coats usually do the trick to flatten out the ceiling. Once sanded, we prime again and follow with two coats of ceiling paint. It takes time, but the result is worth it.”
Add skim coats after scraping for a professional finish
“Popcorn removal is more than just scraping—it’s about the finish,” explains Patch Dudes. “Plan for at least two skim coats to level the ceiling afterward. Smaller rooms take two days, but full homes can take five. Rushing this step leads to uneven, patchy results.”

Removing popcorn ceilings: quick tips from the pros
Always test for asbestos in older homes before scraping
“If your home was built before the ’90s, test the ceiling texture for asbestos first,” warns RGB House Painters. “If it’s safe, mist the surface and use a wide putty knife to scrape gently. We always recommend sealing off the room and covering everything with plastic. Once done, we prime and paint for a fresh, clean look.”
Use protective gear and skim coat after removal
“For DIY removal, always wear a mask, goggles, and gloves, and wet the ceiling before scraping,” advises Mr. Ceiling Master. “If asbestos is a concern, send a sample to a certified lab. After scraping, apply a skim coat, sand smooth, prime, and paint. It’s the only way to get a truly modern, finished look.”
Use the right tools and prep for a clean removal
“To soften the ceiling, use a pump-up sprayer with warm water and let it dwell before scraping,” advises Century Painting. “Use a 5” plaster knife at an angle and don’t press too hard—gouges mean more repairs later. If your ceiling’s been painted, it’ll cost more to remove. After scraping, we skim coat, sand smooth, and finish with two coats of flat ceiling paint.”
Alternatives to removing a popcorn ceiling
If scraping isn’t for you, there are stylish ways to cover a popcorn ceiling without the mess. Decorative ceiling planks or tiles can be installed directly over the existing texture using a surface-mounted system. These come in various finishes, including wood-look options that add warmth and character to any room.
Another option is to install a drop ceiling or apply a new layer of drywall for a completely smooth finish. These methods can save time, reduce dust, and still deliver a modern look—no scraping required.
You can cover popcorn ceilings with decorative planks
“If you want to skip the mess, consider covering popcorn ceilings with wood-look planks,” suggests Kanopi by Armstrong. “They install directly over existing ceilings with tracks and clips, no scraping needed. It’s a quick upgrade that hides damage and adds warmth. Plus, it avoids the risk of asbestos altogether.”
Should you hire a professional to remove popcorn ceilings?
Hiring a professional can save you time, stress, and potential damage—especially if your ceiling has been painted or tested positive for asbestos. Pros have the tools and experience to handle skim coating, sanding, and refinishing quickly and cleanly. They’ll also ensure the room is properly sealed off to keep dust and debris contained.
If you’re unsure about your ceiling’s condition or want a guaranteed smooth finish, hiring a contractor is the safest route.
Painted ceilings are harder to remove and may need professional help
“If your popcorn ceiling feels chalky and flakes off easily, it’s probably unpainted and can be scraped after a light misting,” explains Express Drywall Services. “Painted ceilings are much tougher—you’ll likely need to skim coat or even add new drywall over the top.”
Hire a finisher and ask to see their work before you commit
“Popcorn removal can look deceptively simple, but skim coating and painting are finesse jobs,” says Site 604. “After removal, we use three skim coats and a high-build surfacer for a flawless finish. Then we apply two coats of flat white ceiling paint with a sprayer. Always ask to see in-person examples—photos can be misleading.”
How much does it cost to remove a popcorn ceiling?
DIY removal:
- Materials cost: ~$50–$150
- Time: 1–2 days for an average room
Professional removal:
- Average cost: $1–$2 per square foot
- Total for a 500 sq. ft. room: ~$500–$1,000
- Costs may increase if asbestos is present or repairs are needed
Can removing a popcorn ceiling increase home value?
Yes. Removing popcorn ceilings can:
- Make your home look more modern and updated
- Appeal to more buyers
- Potentially increase resale value, especially in competitive markets
According to real estate experts, a smooth ceiling finish can help your home show better in photos and open houses, offering a solid return on your effort or investment.
Want to know how ceiling updates could impact your home’s value? Try our free What Is My Home Worth? calculator to get an instant estimate.

Frequently asked questions about removing popcorn ceilings
1. Is it safe to remove popcorn ceilings myself?
Yes—if your ceiling has tested negative for asbestos and you’re comfortable with DIY home improvement projects. Always wear protective gear.
2. How long does it take to remove a popcorn ceiling?
For a typical 10’x12′ room, expect the process to take 1–2 days, including prep, removal, repairs, and painting.
3. Can I just paint over a popcorn ceiling instead?
Yes, but it won’t give you the same smooth finish. Painting is a quicker option to refresh the look, though it may darken or weigh down the texture over time.
4. Do all popcorn ceilings contain asbestos?
No. Only some older ceilings—mainly those applied before the 1980s—may contain asbestos. Always test first.
The post How to Remove Popcorn Ceilings: Pro Tips You’ll Wish You Knew Sooner appeared first on Redfin | Real Estate Tips for Home Buying, Selling & More.


