Behind the Lens: One Photographer’s DIY Tether Cart Project

I am a photographer and opened my studio in Vienna in 2021. Since then, I used a RÅSKOG cart with the HÖGSMA top to put my laptop during photoshoots (with my camera tethered to it for instant image review on a bigger screen) and to store some smaller stuff.
Over time, I became a bit annoyed with it due to the following reasons:
Height: It wasn’t exactly comfortable to use the laptop while standing. I’m not getting any younger, and I didn’t want to stand hunched over my laptop like a shrimp every time.
Storage: While the baskets allow for a decent amount of storage, I kind of wished they could hold more stuff. Furthermore, I couldn’t really access the top basket when my laptop was sitting on top.
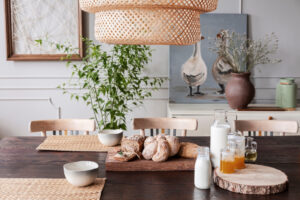
Limited work surface: With my laptop occupying the top, there was no more space available on the tether table. So, I had to place my camera on some other piece of furniture next to it or simply on the floor.
Long story short, as 2023 came to an end, the tether cart was getting too small.
With a rough idea in mind, I compiled the following shopping list to build my new Tether Wagon.
IKEA items used:
BROR Trolley
BROR Hook for Post (2-Set)
STUBBERGET Monitor Bracket
SKÅDIS Pegboard
SKÅDIS Basket Set (3-Set)
SKÅDIS Shelf
KOPPLA Extension Cord
KALKSTUFF Cable Organizer
Additional Stuff needed:
Drill
5mm wood drill bit
2mm metal drill bit (size depends on your choice of screws)
2 screws
How to Set Up a Camera Tether Cart
First, I assembled the BROR Trolley following the standard instructions. The only modification I made was flipping the bottom shelf over, creating a shelf with “walls” to prevent smaller things from falling off while moving it around.
Next, I mounted the STUBBERGET to one corner on the long side of the trolley and set up the 27” monitor.
For the SKÅDIS Pegboard, my initial plan was to attach it using double-sided tape or zip ties, but I realized it’s essentially a painted particleboard. After some measurements, I drilled holes where the screws of the BROR (short side) are located.
I decided to mount the SKÅDIS on the right side of the BROR.
FYI: The square SKÅDIS Pegboard is 1cm wider than the BROR trolley. I mounted it with an equal overhang of 5mm on both sides, but it doesn’t really show.
Tip: After drilling the two top holes, you can unscrew all of the screws on the short side, mount it using the two holes you already drilled on the top, and then use the holes in the BROR as a guide to drill the rest of the holes. It’ll save you some measurements. But be careful where you place your fingers while drilling.
You could probably get away with just drilling 4 holes, but since there were additional holes for an alternative mounting of the lower shelf, I drilled 6. I used the screws that came with the BROR hooks for those, as I attached the hooks with the standard screws.
Next, I measured the width of the keyhole-shaped mounting holes of the KOPPLA extension cord and drilled two holes through the metal of the “first” shelf on the BROR. Two screws later, I was able to slide the KOPPLA onto it.
As a second-to-last step, I mounted the BROR Hooks on the left side of the Wagon. One is to hold the cable of the KOPPLA when not in use, and the other is for my USB-C tethering cable.
As a final step, I used a stick-on KALKSTUFF cable holder on the back of the STUBBERGET Mount to secure the monitor’s HDMI cable.
And so it was done—the Tether Wagon 3000, as I lovingly called it.
Additional ideas to consider:
You can switch out the BROR screws for longer ones and put some spacers (~5mm) on them between the SKÅDIS and the BROR so that you can utilize all of the holes on the Pegboard. When mounting the SKÅDIS without spacers, as I did for now, some of the holes are obstructed by the posts/shelves of the
BROR behind. I plan to do this ASAP.
You can add another SKÅDIS on the other short side if you want to have more flexibility with small parts storage.
It’s possible to add SKÅDIS organizers on the inside as well.
You can add additional BROR Hooks to basically every screw position on the BROR.
I can’t wait to use my new Tether Wagon 3000 for my photoshoots. Here are more photos of the photography tether cart.
~ by Daniel of DWPhoto
The post Behind the Lens: One Photographer’s DIY Tether Cart Project appeared first on IKEA Hackers.